Install Backend and Frontend Components with the Entando Component Generator
This blog post explores the concept of application generation, entity definition, and their deployment into an Entando application.
Hi my fellow developers,
Let’s go further in the bundle series today with this introduction to the Entando Component Generator (ECG). Based on JHipster, through a blueprint, the ECG makes your life easier when it comes to developing a backend and micro frontend application. It allows you to generate your compone and start the development of your business features and package them into an Entando bundle to deploy them in a few steps.
In this blog post, we will introduce the concept of application generation, entity definition, and their deployment into an Entando application.
This blog post is part of the Entando bundle series:
- Sharing Components in a Marketplace for Developers with Entando Bundles
- The Components That Make Up An Entando Application
- Frontend and Backend Components
- CMS Components
- Page, User Management and Localization Components
- Generating and Deploying Micro Frontends and Microservices With Entando Blueprint
Table of Contents
- Prerequisites
- Generate your Backend and Frontend Components
- The Entando Component Generator
- A JHipster Blueprint
- Generate the Backend
- The Entity Sub-Generator
- Entity’s Definition
- Micro Frontend Definition
- Generate the Entity
- The Generated Bundle
- Push the Code into a GitHub Repository
- The Entando Component Generator
- Build the Microservice and MFEs
- Publish the Bundle
- Initiate the Publishing
- Publish the Artifacts
- Deploy and Install the Bundle
- Going Further
- Launch the backend and frontend locally
- Start the Keycloak
- Start the Backend
- Start the MFEs
- Deploy the Frontend or the Backend only
- Launch the backend and frontend locally
- Conclusion
Prerequisites
In order to run the commands present in this article, you need to have the ENT CLI and a running Entando instance installed. I suggest following the automatic installation process.
You also need a GitHub account and two repositories. By convention, we add the “-bundle” to the bundle repository. e.g “testProject” and “testProject-bundle”.
You also need a DockerHub account.
Generate your Backend and Frontend Components
THE ENTANDO COMPONENT GENERATOR
A JHipster Blueprint
JHipster is an open-source generator to create cloud and prod-ready Java Spring boot applications. The blueprint technology allows third-party developers to customize the JHipster behavior and the outcomes.
The ECG is a blueprint that generates fully Entando compatible Java applications and micro frontends.
The ECG comes with the ENT CLI, or you can install it by running the check-env command.
The correct JHipster and blueprint versions are automatically installed and are isolated from any existing JHipster versions if you have other instances installed.
Generate the Backend
The first step will be to generate the code source by using the JHipster blueprint in order to initiate the backend.
First, create a folder to generate your project:
mkdir testProject && cd testProject
From this folder, generate an application using the following command:
ent jhipster --blueprints entando
Please note you will probably need to give some information before JHipster will be launch if you don’t init the project before:
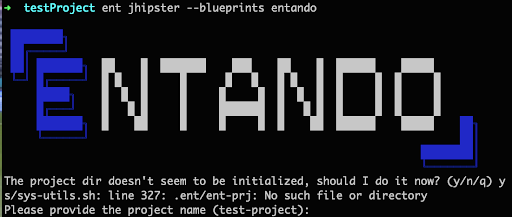
When answering these questions. You can select default values by just clicking on enter or select specific values. For this blog post, I only select the default ones.
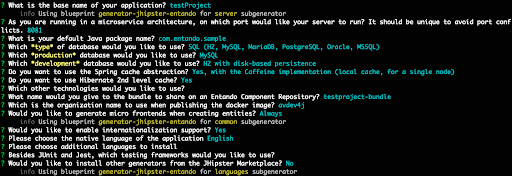
Note that you can elect to enable or disable micro frontend generation by answering the question:
Would you like to generate micro frontends when creating entities?
- Always: MFE will be created each time an entity is created
- Ask: Each time an entity is created you can choose to generate the MFE or not
- Never: no MFE are created
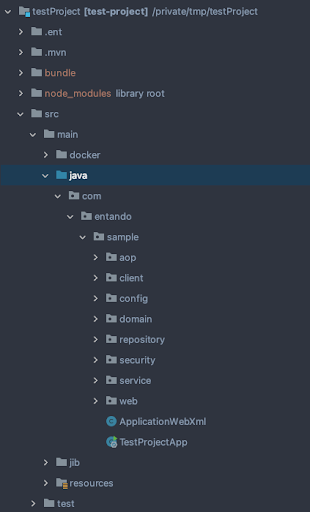
After this step, your application is generated and contains the backend code in Java based on the SpringBoot and the configuration needed to run it in both dev and production environments.
THE ENTITY SUB-GENERATOR
Entity’s Definition
The entity term comes from the Java Persistence API and defines the object used to wrap the data stored in the database in a Plain Old Java Object (POJO).
With JHipster, the entity generator generates this POJO and all the code and configuration with from a definition file.
The Entando Component Generator adds the capability to generate React micro frontends linked to the entity alongside the Java backend code.
Micro Frontend Definition
The micro frontend (MFE) extends the concept of self-contained isolated applications introduced by the microservices to apply it to the frontend. A micro frontend is a frontend application with a single responsibility, isolated from the rest of the application. The final application is composed of multiple micro frontends.
In the HTML page the MFE is included by using a custom element, the MFE DOM is placed in a “shadow DOM”.
The ECG generates three micro frontends per entity
- detailsWidget: render the entity field values
- formWidget: permit the adding/editing for a given entity
- tableWidget: renders a list of entity in a HTML table
Each MFE is known as a Widget in the application bundle.
|
Why are we talking about MFEs as “widgets” at Entando? |
Generate the Entity
From your project location, run:
ent jhipster entity conference
- “conference” is the entity name
The first step is to define the entity fields by giving a name, select the type, and validation rules. You can create any number of fields you want.
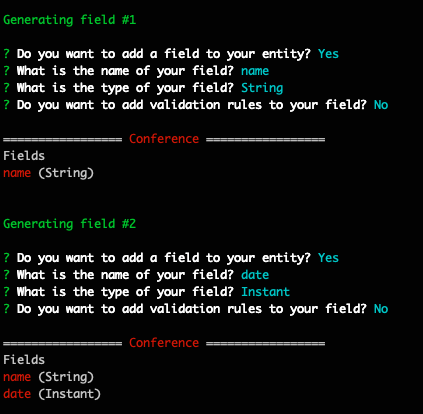
Then you can choose to create relationships with other entities, but for this example we’ll generate only one entity.

The next question allows you to define the architecture you want to use in your application for controllers and business logic.

|
The entity generator lets you choose between different implementations according to whether you want to expose the entities directly or use a business service layer between, with interfaces or not. |
The last step provides a few advanced options. Just answer “no” to both.

Following these questions, the entity is created and the code is updated.
|
A message about conflicts with Liquibase files will be displayed. The entity generator replaces the previous master.xml file. Here, just override it. |
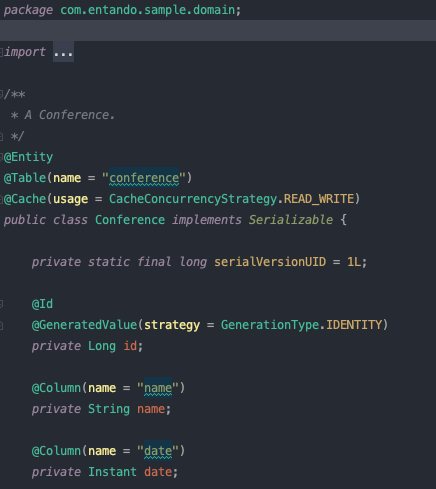
The JPA entity is available in the domain folder. The MFEs can be found in the ui/widgets folder.
THE GENERATED BUNDLE
The bundle is available in the “bundle” folder at the project root level and references both the microservice as a plugin and the MFEs as widgets.
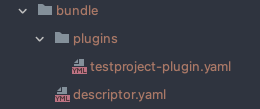
code: testproject-bundle description: This is the testProject bundle components: plugins: - plugins/testproject-plugin.yaml widgets: - ui/widgets/conference/tableWidget/conference-table-widget-descriptor.yaml - ui/widgets/conference/detailsWidget/conference-details-widget-descriptor.yaml - ui/widgets/conference/formWidget/conference-form-widget-descriptor.yaml # entando-needle-descriptor-add-widgets - Entando blueprint will add widget bundle files here
But it’s not enough and in the next chapter, we will improve it.
PUSH THE CODE INTO A GITHUB REPOSITORY
Even if it’s not mandatory to finish this tutorial, I suggest you push the code into a GitHub repository.
git add . git commit -m "first commit" git branch -M main git remote add origin https://github.com//testProject.git git push -u origin main
Build the Microservice and MFEs
To achieving this step the ENT CLI will help us by providing a unique command to build them all, run this command from your project location:
ent prj build
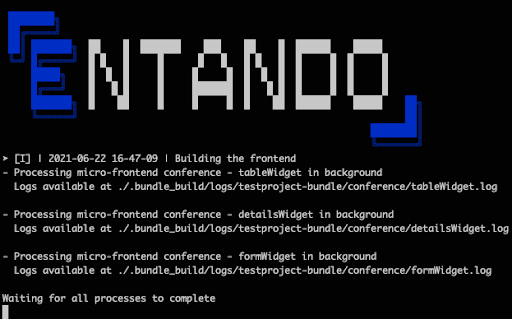
This command builds all the MFEs and the backend application (including the docker image), this process can take some time to complete.
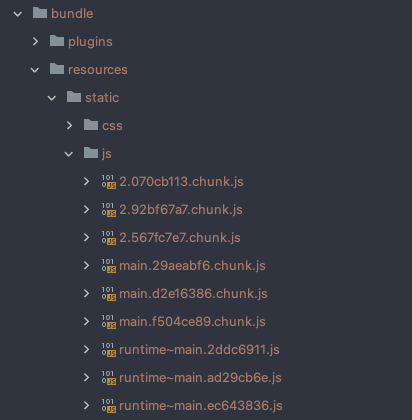
When the build process is fully completed, you should have
- Frontend build resources (JS, CSS…) in the bundle/resources folder
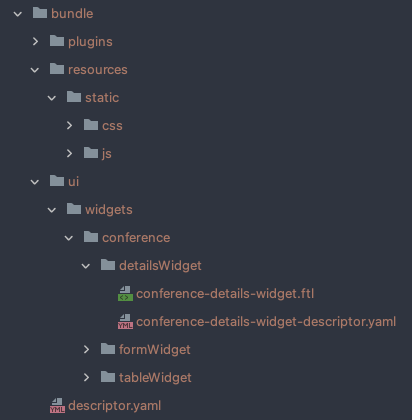
- The MFE bundle definition files updated and moved to the main bundle folder
code: conference-details-widget titles: en: Conference Details Widget it: Conference Details Widget group: free customUiPath: conference-details-widget.ftl
<#assign wp=JspTaglibs["/aps-core"]> <script src="<@wp.resourceURL />testproject-bundle/static/js/2.567fc7e7.chunk.js"></script> <script src="<@wp.resourceURL />testproject-bundle/static/js/2.567fc7e7.chunk.js.map"></script> <script src="<@wp.resourceURL />testproject-bundle/static/js/main.29aeabf6.chunk.js"></script> <script src="<@wp.resourceURL />testproject-bundle/static/js/main.29aeabf6.chunk.js.map"></script> <script src="<@wp.resourceURL />testproject-bundle/static/js/runtime~main.ad29cb6e.js"></script> <script src="<@wp.resourceURL />testproject-bundle/static/js/runtime~main.ad29cb6e.js.map"></script> <link href="<@wp.resourceURL />testproject-bundle/static/css/main.552b72a3.chunk.css" rel="stylesheet"> <link href="<@wp.resourceURL />testproject-bundle/static/css/main.552b72a3.chunk.css.map" rel="stylesheet"> <#-- entando_resource_injection_point --> <#-- Don't add anything above this line. The build scripts will automatically link the compiled JS and CSS for you and add them above this line so that the widget can be loaded--> <conference-details service-url="/avdev4j/test-project/0-0-1-snapshot" />
The docker image is pushed into your local docker repository
docker image ls

Publish the Bundle
The publishing step will push the artifacts into repositories so that they can be downloaded by the Entando application during the installation phase.
We need two repositories:
- A GitHub repository to store the bundle definition and the JS/CSS artefacts
- A DockerHub project to push the Docker image
INITIATE THE PUBLISHING
Run the following command from your project location
ent prj pbs-init
You need to answer the questions. Please note you have to use the HTTPS URL for the GitHub repository.
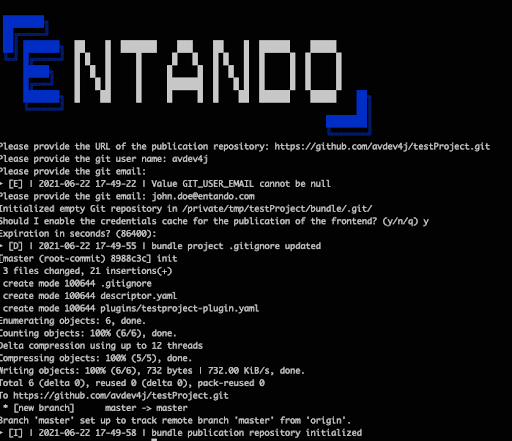
At the conclusion of this command the plugin and the main bundle descriptor have been pushed to GitHub.

PUBLISH THE ARTIFACTS
Run the following command from your project location:
ent prj pbs-publish
You will need to provide a version for your bundle. Note this version will be used to tag your bundle on Git. We usually use semantic versioning, note that if you want to follow the Git tagging convention, you need to explicitly use the prefix “v”, e.g “v0.0.1”.

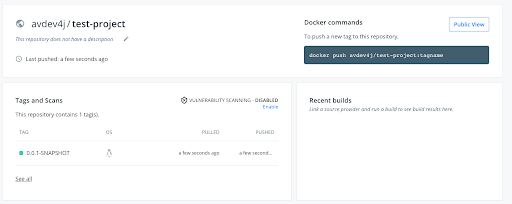
Your GitHub repository contains now all the bundle descriptors and the JS and CSS resource files.

The Docker image is available on DockerHub.
Deploy and Install the Bundle
Now that the bundle and the artifacts have been pushed into the different repositories, we can install them on the Entando application.
We define two different steps between making the bundle available in the Entando Component repository and install it or a given version.
To deploying your bundle you need to run this command from your project location:
ent prj deploy

The ECR is empty by default.

After the deployment, the ECR contains your bundle.
However, the deployment is not enough to use our micro frontends in our application. We also need to explicitly install it. You can do it through the app-builder UI by clicking on the “install” button or by using the ENT CLI again and run the following command:
ent prj install
Note adding the --conflict-strategy parameter allows you to define the strategy to adopt if the components already exist: override, create or skip them.
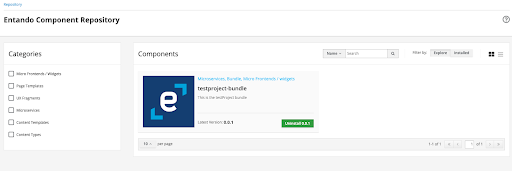
The bundle is installed and the components are available in your Entando application.
Congratulations, your micro frontends are now available and you can add them into pages and display them.
To check the plugin running you can run the following command:
ent kubectl get pods -n entando
You should be able to see two pods with the name starting by “<organisation>-test-project”. One is for the database and one is for the backend Java application.

Going Further
LAUNCH THE BACKEND AND FRONTEND LOCALLY
https://dev.entando.org/v6.3/docs/reference/entando-cli.html#run-a-project-locally
Start the Keycloak
In order to run the components locally you firstly need to start the keycloak image by running the following command into your folder:
ent prj ext-keycloak start
The Keycloak is started when the following message is displayed:

Start the Backend
Starting the backend will launch the .jar artifact as you can do with any vanilla SpringBoot executable jar.
Still in your project location, run the command:
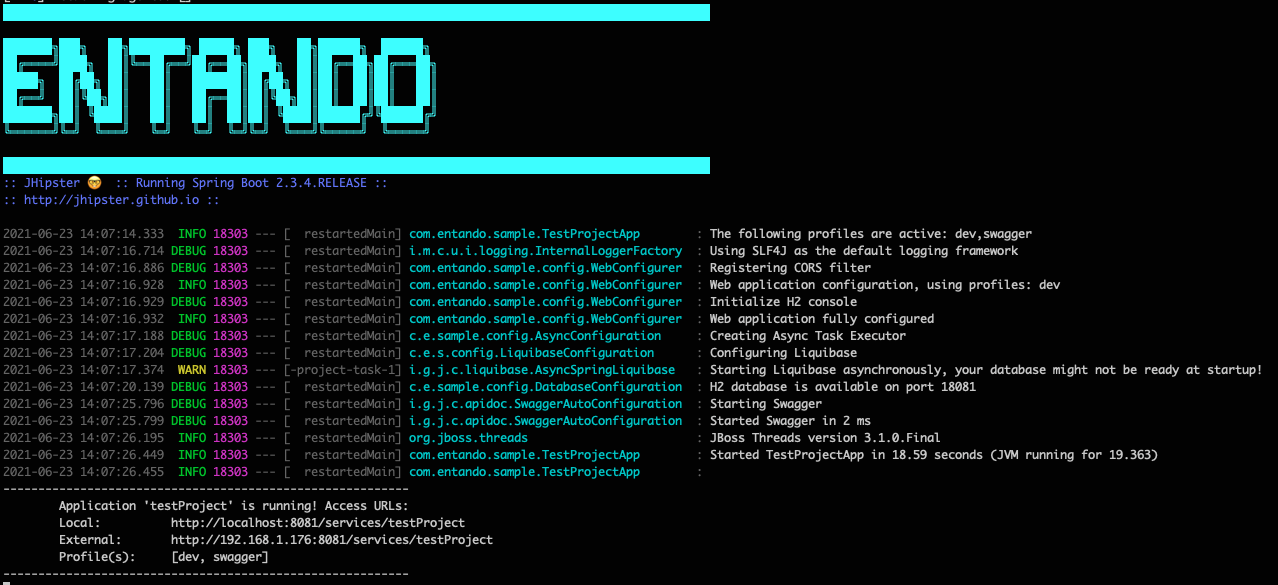
ent prj be-test-run
When the application is ready you can access it at http://localhost:8081/services/testProject
Start the MFEs
To start a micro frontend you need to run the following command in your project location:
ent prj fe-test-run
You will be able to select which one you want to start

The MFE is available on the default 3000 port: http://localhost:3000/

If you want to run more than one at the same time, the port is incremented by one.

DEPLOY THE FRONTEND OR THE BACKEND ONLY
For some reason, you may want to handle only either the frontend or the backend. For example, for a modification in an MFE, you should only re-build and push the frontend not the backend and the Docker image.
For achieving this, it’s possible to use the dedicated commands:
| Frontend | Backend | |
|---|---|---|
| Publish | ent prj fe-build | ent prj be-build |
| Push | ent prj fe-push | ent prj be-build |
| Deploy | ent prj deploy | ent prj deploy |
If you want to learn about the ENT CLI commands, feel free to read this series on our blog.
Conclusion
This article is probably the one that goes further in the Entando workflow with bundles. From the generation to the installation, we saw a few tools we provide to make the developer's life easier.
Now you know how to leverage these tools to improve your productivity, the next blog post will deal with bundle extractions from an existing environment.
I’m looking forward to seeing you again and sharing my bundle knowledge with you.
